
RJ45 Ethernet connection issues
- Thread starter Teeling611
- Start date
You are using an out of date browser. It may not display this or other websites correctly.
You should upgrade or use an alternative browser.
You should upgrade or use an alternative browser.

They probably included 24awg pass thrus…. 23 awg will be a bitch
How to tell the difference? Can’t find anything on the connector. Just says cat6 on packaging not the wire gauge. It’s almost an impossible task getting the wires thru. I tried just one wire and that just as bad. When I did get them thru I had to use a pair of pliers to grab all the wire and pull like hell to get them back to the sheathing. All this was done sitting on my couch I can’t imagine doing this on a ladder outside.
To straighten the wires I used a jewelry tool my wife uses to straighten wire. Works great but doesn’t help with the pass-thru connectors. After all your responses I’m beginning to think it’s the wrong size cat6 connectors for 23 gauge wire

Many thanks for all your help!
Attachments
Last edited:
After terminating literally hundreds of RJ-45's on CAT-5 cable over the years, I got very good at it, although lke most folks, it didn't start out that way. Then after the 'smooth sailing' for a number of years, along comes CAT-6 with it's 'stacked & staggered' pair layout and thicker conductors (23 AWG). I struggled...and I struggled until I read a post on IPCT regarding a 2-piece RJ-45 that allows you to more easily get the conductors in the correct order AND get them inserted fully into the RJ-45 for crimping. Sure, they cost more but IMO, I saved time AND money by getting them done quickly and correctly the first time. I use a conventional crimper.
Check out my post ==>> What works for me when terminating the RJ-45's on CAT-6 cable
Here are the 2 pc. RJ-45's for CAT-6 at monoprice ==>> Monoprice 8P8C RJ45 Plug with Inserts for Solid Cat6 Ethernet Cable, 100 pcs/pack

Check out my post ==>> What works for me when terminating the RJ-45's on CAT-6 cable
Here are the 2 pc. RJ-45's for CAT-6 at monoprice ==>> Monoprice 8P8C RJ45 Plug with Inserts for Solid Cat6 Ethernet Cable, 100 pcs/pack
Last edited:
As an Amazon Associate IPCamTalk earns from qualifying purchases.

Mike A.
Known around here
- May 6, 2017
- 4,209
- 7,097
Take a look at the reviews for the RJ45 connectors that you got. There are some mentioning the same problem with some brands of cable. If it's that hard, then that's probably it.
.https://www.amazon.com/Pass-Thru-Modular-Klein-Tools-VDV826-703/dp/B076PRM7W8?th=1
.https://www.amazon.com/Pass-Thru-Modular-Klein-Tools-VDV826-703/dp/B076PRM7W8?th=1
cat5e would probably slide in smoothly. Im sure either the cable or the jack is incompatible with the ieee standard or you have 5 mixed with 6 and thats a problem. should be easy to pass thru.
Smilingreen
Known around here
When training greenhorns how to prep for a connector, I always had a bin that had bread ties that came off of bread wrappers. I would have the greenhorns practice straightening out the wire bread ties with their fingers. Once they figured out how to radius bend the tie back and forth through their fingers while pulling it, then they were ready for CAT cable. It's basically "practice makes perfect" kind of deal.
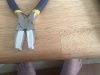
I do a variation of this, but I drag the the pairs across my pliers handle to finalize them and then cut.
IAmATeaf
Known around here
I just line up and arrange the wires in order then massage them between my fingers until they are straight as half inch wires can be and they stay in that order. Then carefully insert, never used pass through so you have to be very careful until your convinced that the wires are in the correct order.
Smilingreen
Known around here
Might be a long, drawn out post: Lots of pictures......
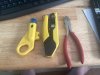
I start off by doing a clean, straight cut with a sharp pair of electrician scissors.

Any kind of sharp scissors will work, electrician scissors are just my personal preference.

Next, I take the scissors, open them, place about 1-1/4" of the cable and set it into the open "V" of the scissors.
What I am going to do is while applying gentle pressure of the cable into the V, I am going to rotate the cable into the V,
making a circular score mark in the outside of the cable jacket. Ensure you do not apply too much pressure and nick the insulation of the conductors within the inside of the jacket.

When properly scored, you should be able to bend the cable at the score mark and the jacket should split open.

Lightly bend the break in a circular motion and the jacket should completely separate for the other side.

Slide the jacket piece off, which will leave you with 1-1/4" of 4 twisted pair conductors and the tension fiber.

Gather all the fiber into 1 string, take your scissors and cut it off flush with the edge of the jacket.

This will leave you with 4 twisted pairs.

Next, we will un-twist all 4 pairs back to the edge of the jacket. Now, we will proceed with straightening each of the
8 wires with your fore-finger and thumb. Grab 1 wire at the edge of the outer jacket, pinch it between your fore-finger
and thumb, all the while applying a gentle radius while pulling the wire through your finger and thumb to the end of it.
Now, grab the same wire again and repeat, but this time, apply a opposite radius effect while pinching the wire.
Do this on all 8 wires until they all are fairly straight. Practice makes perfect. Curled wires won't seat and crimp correctly.


Now, you are going to pinch between you fingers, the edge of the stripped outer jacket and orient your
individual wires according to you crimping scheme. I use the following orientation from left to right:
wht/org
org
wht/grn
blu
wht/blu
grn
wht/brn
brn

Now, take your other thumb and fore-finger and pull several times until all the wires are lined up neatly next to each other.
Notice in the picture above how all of the individual wires are different lengths and are bent a bit at the end of each one?
We are going to fix that in this step. Take your scissors, go down about 1/4" from the top of the wires,
aligning the scissors up square and in one motion, cut all 8 wires at the same time.
Don't let go of the cable with your finger and thumb after cutting.

Now, we are ready to put the RJ-45 connector onto the 8 wires. While still grasping the wires with your finger and thumb,
orient the RJ-45 connector so the tab is facing downwards. Gently, slide the fanned wires into the RJ-45 connector,
very slightly wiggling the bundle from left to right, if needed, into the RJ-45 connector.
If you do it correctly, all 8 wires should easily slide into its intended slot and will come out the front end of the connector.

Now, we are ready to seat the jacket into the RJ-45 connector so we can crimp it.
Grasp the out cable jacket and push the jacket into the connector as far as it will go,
while taking your other hand and pull the wires farther out the front of the RJ-45 connector.
Now, we are ready to install the RJ-45 connector and cable into the crimper.

Orient the RJ-45 connector into the crimper with the connector locking tab facing upwards, with the
connector tab aligned with the slot for it in the body of the crimper.
Gently pass the wires into the cavity, ensuring they don't hit the shearing blade on the other side of the cavity.
Push the connector, along with the wires until you hear the little "click" noise, letting you know
the connector is properly seated into the crimper.

Now, you are ready to crimp. Using gentle pressure on the cable, pushing it inwards towards the crimper,
use your other hand and in one smooth motion, fully crimping the connector.
The shearing blade will actuate while the knife pins are pressed into each individual wire, neatly trimming
off all wires to the edge of the RJ-45 connector. After you release the handle on the crimpers, you should
be able to remove the completed crimp on RJ-45 connector. Look closely at the crimp. Is your outer jacket
still firmly pushed to the inside of the connector? If so, you should be good to go.

I start off by doing a clean, straight cut with a sharp pair of electrician scissors.
Any kind of sharp scissors will work, electrician scissors are just my personal preference.
Next, I take the scissors, open them, place about 1-1/4" of the cable and set it into the open "V" of the scissors.
What I am going to do is while applying gentle pressure of the cable into the V, I am going to rotate the cable into the V,
making a circular score mark in the outside of the cable jacket. Ensure you do not apply too much pressure and nick the insulation of the conductors within the inside of the jacket.
When properly scored, you should be able to bend the cable at the score mark and the jacket should split open.
Lightly bend the break in a circular motion and the jacket should completely separate for the other side.
Slide the jacket piece off, which will leave you with 1-1/4" of 4 twisted pair conductors and the tension fiber.
Gather all the fiber into 1 string, take your scissors and cut it off flush with the edge of the jacket.
This will leave you with 4 twisted pairs.
Next, we will un-twist all 4 pairs back to the edge of the jacket. Now, we will proceed with straightening each of the
8 wires with your fore-finger and thumb. Grab 1 wire at the edge of the outer jacket, pinch it between your fore-finger
and thumb, all the while applying a gentle radius while pulling the wire through your finger and thumb to the end of it.
Now, grab the same wire again and repeat, but this time, apply a opposite radius effect while pinching the wire.
Do this on all 8 wires until they all are fairly straight. Practice makes perfect. Curled wires won't seat and crimp correctly.
Now, you are going to pinch between you fingers, the edge of the stripped outer jacket and orient your
individual wires according to you crimping scheme. I use the following orientation from left to right:
wht/org
org
wht/grn
blu
wht/blu
grn
wht/brn
brn
Now, take your other thumb and fore-finger and pull several times until all the wires are lined up neatly next to each other.
Notice in the picture above how all of the individual wires are different lengths and are bent a bit at the end of each one?
We are going to fix that in this step. Take your scissors, go down about 1/4" from the top of the wires,
aligning the scissors up square and in one motion, cut all 8 wires at the same time.
Don't let go of the cable with your finger and thumb after cutting.
Now, we are ready to put the RJ-45 connector onto the 8 wires. While still grasping the wires with your finger and thumb,
orient the RJ-45 connector so the tab is facing downwards. Gently, slide the fanned wires into the RJ-45 connector,
very slightly wiggling the bundle from left to right, if needed, into the RJ-45 connector.
If you do it correctly, all 8 wires should easily slide into its intended slot and will come out the front end of the connector.
Now, we are ready to seat the jacket into the RJ-45 connector so we can crimp it.
Grasp the out cable jacket and push the jacket into the connector as far as it will go,
while taking your other hand and pull the wires farther out the front of the RJ-45 connector.
Now, we are ready to install the RJ-45 connector and cable into the crimper.
Orient the RJ-45 connector into the crimper with the connector locking tab facing upwards, with the
connector tab aligned with the slot for it in the body of the crimper.
Gently pass the wires into the cavity, ensuring they don't hit the shearing blade on the other side of the cavity.
Push the connector, along with the wires until you hear the little "click" noise, letting you know
the connector is properly seated into the crimper.
Now, you are ready to crimp. Using gentle pressure on the cable, pushing it inwards towards the crimper,
use your other hand and in one smooth motion, fully crimping the connector.
The shearing blade will actuate while the knife pins are pressed into each individual wire, neatly trimming
off all wires to the edge of the RJ-45 connector. After you release the handle on the crimpers, you should
be able to remove the completed crimp on RJ-45 connector. Look closely at the crimp. Is your outer jacket
still firmly pushed to the inside of the connector? If so, you should be good to go.
I just line up and arrange the wires in order then massage them between my fingers until they are straight as half inch wires can be and they stay in that order. Then carefully insert, never used pass through so you have to be very careful until your convinced that the wires are in the correct order.
thanks
Might be a long, drawn out post: Lots of pictures......
I start off by doing a clean, straight cut with a sharp pair of electrician scissors.
View attachment 151576
Any kind of sharp scissors will work, electrician scissors are just my personal preference.
View attachment 151577
Next, I take the scissors, open them, place about 1-1/4" of the cable and set it into the open "V" of the scissors.
What I am going to do is while applying gentle pressure of the cable into the V, I am going to rotate the cable into the V,
making a circular score mark in the outside of the cable jacket. Ensure you do not apply too much pressure and nick the insulation of the conductors within the inside of the jacket.
View attachment 151579
When properly scored, you should be able to bend the cable at the score mark and the jacket should split open.
View attachment 151582
Lightly bend the break in a circular motion and the jacket should completely separate for the other side.
View attachment 151583
Slide the jacket piece off, which will leave you with 1-1/4" of 4 twisted pair conductors and the tension fiber.
View attachment 151584
Gather all the fiber into 1 string, take your scissors and cut it off flush with the edge of the jacket.
View attachment 151585
This will leave you with 4 twisted pairs.
View attachment 151586
Next, we will un-twist all 4 pairs back to the edge of the jacket. Now, we will proceed with straightening each of the
8 wires with your fore-finger and thumb. Grab 1 wire at the edge of the outer jacket, pinch it between your fore-finger
and thumb, all the while applying a gentle radius while pulling the wire through your finger and thumb to the end of it.
Now, grab the same wire again and repeat, but this time, apply a opposite radius effect while pinching the wire.
Do this on all 8 wires until they all are fairly straight. Practice makes perfect. Curled wires won't seat and crimp correctly.
View attachment 151587
View attachment 151588
View attachment 151589
View attachment 151590
Now, you are going to pinch between you fingers, the edge of the stripped outer jacket and orient your
individual wires according to you crimping scheme. I use the following orientation from left to right:
wht/org
org
wht/grn
blu
wht/blu
grn
wht/brn
brn
View attachment 151591
Now, take your other thumb and fore-finger and pull several times until all the wires are lined up neatly next to each other.
Notice in the picture above how all of the individual wires are different lengths and are bent a bit at the end of each one?
We are going to fix that in this step. Take your scissors, go down about 1/4" from the top of the wires,
aligning the scissors up square and in one motion, cut all 8 wires at the same time.
Don't let go of the cable with your finger and thumb after cutting.
View attachment 151592
Now, we are ready to put the RJ-45 connector onto the 8 wires. While still grasping the wires with your finger and thumb,
orient the RJ-45 connector so the tab is facing downwards. Gently, slide the fanned wires into the RJ-45 connector,
very slightly wiggling the bundle from left to right, if needed, into the RJ-45 connector.
If you do it correctly, all 8 wires should easily slide into its intended slot and will come out the front end of the connector.
View attachment 151594
Now, we are ready to seat the jacket into the RJ-45 connector so we can crimp it.
Grasp the out cable jacket and push the jacket into the connector as far as it will go,
while taking your other hand and pull the wires farther out the front of the RJ-45 connector.
Now, we are ready to install the RJ-45 connector and cable into the crimper.
View attachment 151595
Orient the RJ-45 connector into the crimper with the connector locking tab facing upwards, with the
connector tab aligned with the slot for it in the body of the crimper.
Gently pass the wires into the cavity, ensuring they don't hit the shearing blade on the other side of the cavity.
Push the connector, along with the wires until you hear the little "click" noise, letting you know
the connector is properly seated into the crimper.
View attachment 151596
Now, you are ready to crimp. Using gentle pressure on the cable, pushing it inwards towards the crimper,
use your other hand and in one smooth motion, fully crimping the connector.
The shearing blade will actuate while the knife pins are pressed into each individual wire, neatly trimming
off all wires to the edge of the RJ-45 connector. After you release the handle on the crimpers, you should
be able to remove the completed crimp on RJ-45 connector. Look closely at the crimp. Is your outer jacket
still firmly pushed to the inside of the connector? If so, you should be good to go.
View attachment 151598
Very nice and detailed writeup! Only one problem “If you do it correctly, all 8 wires should easily slide into its intended slot and will come out the front end of the connector” Not a chance in hell with what I have. I did my best buying the proper tools, connectors, wire etc. The tools and connectors alone cost more than the wire. There is no way these wires are going to easily fit thru these ca6/connectors No matter what you do! Old saying goes you can’t put 10 pounds of shit in a five pound bag. Think I’ll cut my losses at this point and just hire someone to put on the connectors. I really appreciate your input though.
CanCuba
Known around here
thanks
Very nice and detailed writeup! Only one problem “If you do it correctly, all 8 wires should easily slide into its intended slot and will come out the front end of the connector” Not a chance in hell with what I have. I did my best buying the proper tools, connectors, wire etc. The tools and connectors alone cost more than the wire. There is no way these wires are going to easily fit thru these ca6/connectors No matter what you do! Old saying goes you can’t put 10 pounds of shit in a five pound bag. Think I’ll cut my losses at this point and just hire someone to put on the connectors. I really appreciate your input though.
Before you do that, maybe buy some connectors that are designated CAT6. Like @Mike A. said, people have reported problems with these connectors. And connectors are dirt cheap.
Smilingreen
Known around here
It does get easier after you have done a few thousand of these.....I can kind of do it in my sleep. About 2 to 3 minutes per connector with a sip or two of coffee included.thanks
Very nice and detailed writeup! Only one problem “If you do it correctly, all 8 wires should easily slide into its intended slot and will come out the front end of the connector” Not a chance in hell with what I have. I did my best buying the proper tools, connectors, wire etc. The tools and connectors alone cost more than the wire. There is no way these wires are going to easily fit thru these ca6/connectors No matter what you do! Old saying goes you can’t put 10 pounds of shit in a five pound bag. Think I’ll cut my losses at this point and just hire someone to put on the connectors. I really appreciate your input though.
Mike A.
Known around here
- May 6, 2017
- 4,209
- 7,097
Yeah, don't give up on it. Not that difficult and you seem to have the idea now. You'll need to know how since you'll likely have to do later at some point. Try some other RJ45s. Sounds like between cable and connectors it's making it much harder than it should be.
The ones I linked above WILL work on CAT-6; they're Monoprice on amazon (Monoprice is out of stock but amazon says they have 'em).Not a chance in hell with what I have. I did my best buying the proper tools, connectors, wire etc. The tools and connectors alone cost more than the wire. There is no way these wires are going to easily fit thru these ca6/connectors No matter what you do!
Heck, how many do you need? I'll mail you some...PM me your address!

As an Amazon Associate IPCamTalk earns from qualifying purchases.
You guys are great! I won‘t give up yet! I’ll buy some other connectors and give them a try.
Alaska Country
Getting comfortable
If you are in a hurry to get things going try the Home Depot CAT-6 connectors. Like their CAT-5e connectors, but they are twice the price but handy when your primary supply runs out. Perhaps Lowe's would be another option depending on where you are located.
The ones I linked above WILL work on CAT-6; they're Monoprice on amazon (Monoprice is out of stock but amazon says they have 'em).
Heck, how many do you need? I'll mail you some...PM me your address!
Thanks but did you review the comments on theses? There worst than what I purchased!
As an Amazon Associate IPCamTalk earns from qualifying purchases.

I don't rely much on amazon reviews. Many are written by people that couldn't find their butt with both hands.Thanks but did you review the comments on theses? There worst than what I purchased!
I actually used about 30 of them and had not one single problem....do you think I would recommend an inferior product to another forum member?
So please...do me a favor and don't buy them and try to use them...you might blame me if they don't work out for you.

Last edited:
I don't rely much on amazon reviews. Many are written by people that couldn't find their butt with both hands.
I actually used about 30 of them and had not one single problem....do you think I would recommend an inferior product to another forum member?
So please...do me a favor and don't buy them and try to use them...you might blame me if they don't work out for you.
Don’t be so sensitive reviews are what they are not a reflection on you whatsoever!