To upgrade
Blue Iris 5 to Blue Iris 6, you must
manually run a full installer rather than using the built-in automatic updater, as the software transitions to a new installation directory (C:\Program Files\Blue Iris) and updates core Microsoft libraries. Your existing Blue Iris 5 license key will
automatically transition and remain valid, provided you have an active support and maintenance plan. [
1,
2,
3]
Follow this sequence to ensure a smooth, problem-free upgrade:
1. Verify Maintenance Plan
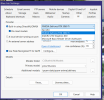
- Open Blue Iris 5 and navigate to Settings > About tab.
- Check that your Support and Maintenance status is active.
- If it has expired, select Upgrade/renew to purchase a maintenance plan before proceeding. [1]
- 2. Back Up Your Current Settings
- In the Blue Iris 5 settings, click Export settings to save a local backup registry file (.reg).
- Note: While the v6 installer usually detects and imports your settings automatically, this backup protects your camera configurations in case of a migration error. [1, 2, 3, 4]
3. Stop the Blue Iris 5 Windows Service
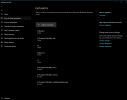
- Open the Windows Start Menu, type Services, and press Enter.
- Locate Blue Iris in the list, right-click it, and select Stop.
- Right-click it again, select Properties, and change the Startup Type from Automatic to Manual or Disabled. This prevents version 5 from automatically launching in the background. [1, 2]
- 4. Install Blue Iris 6
- Download the official setup file from the Blue Iris Download Page.
- Run the executable installer.
- Allow the installer to update your Microsoft Visual Studio C++ redistributable libraries if prompted.
- Follow the setup wizard to complete the installation. [1, 2, 3, 4, 5]
- 5. Verify and Clean Up
- Launch Blue Iris 6. Your cameras, settings, license key, and clips should carry over immediately.
- Restart your computer to finalize system background tasks.
- Once you confirm version 6 is fully functional, open Windows Add or Remove Programs and safely uninstall Blue Iris 5 to free up disk space.
- Delete any leftover legacy Blue Iris 5 folders on your C:\ drive. [1, 2, 3]
 Post-Upgrade Optimization Tip
Because version 6 relocates the software to C:\Program Files\Blue Iris, your previous antivirus exclusions will no longer apply. Go into Windows Defender (or your third-party antivirus) and add an exclusion for the new Blue Iris folder. Failing to do this can cause severe CPU spikes up to 100% as the antivirus attempts to scan live video database files. [1, 2, 3]