IPC-T5442T-ZE mount Q

Left Coast Geek

Getting comfortable
Joined
May 20, 2021
Messages
389
Reaction score
398
Location
mid-left coast
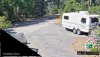
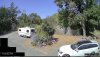
I have the T5442T-ZE on the '203 wall mount, the mount is flat and level, but I can't quite aim the camera up as high as I'd like, the lip around the turret cam's lens extrusion runs into the top of the 'socket' that it swivels n. I'm using this camera at 12mm, and the TOP of the field of view is approximately level, the bottom is quite down-looking. I have a physically quite similar Amcrest Dahua OE camera in the similar 204 mount (4 screw instead of 3), and the Amcrest can go distinctly higher so the center of the FOV is approximately level.
 

sebastiantombs

Known around here
Joined
Dec 28, 2019
Messages
11,511
Reaction score
27,695
Location
New Jersey
Rotate the turret 180 degrees and turn the ball 180 degrees or some combination there of. Remember both the ball and turret rotate so you have to think three dimensionally.
 

Left Coast Geek

Getting comfortable
Joined
May 20, 2021
Messages
389
Reaction score
398
Location
mid-left coast
Rotate the turret 180 degrees and turn the ball 180 degrees or some combination there of. Remember both the ball and turret rotate so you have to think three dimensionally.
the back side of the turret 'socket' is much lower than the front side, so no, that won't work :p

yeah, Dremel may be my solution.
 

sebastiantombs

Known around here
Joined
Dec 28, 2019
Messages
11,511
Reaction score
27,695
Location
New Jersey
^^^ That's what I thought. Think in three dimensions, not two. I have a 3241 that I needed lower than the "standard" configuration allowed....until I rotated a little, reversed the ball and got the FOV I wanted. That's the beauty of a turret, any direction needed, up down, left, right.
 

Left Coast Geek

Getting comfortable
Joined
May 20, 2021
Messages
389
Reaction score
398
Location
mid-left coast
short of putting a wedge between the camera base and the mount, or between the mount and the chimney, i just don't see how I get the right of these two cameras to aim any higher.


(ignore the holes from previous installations, I'll be filling them eventually. note none of these holes go more than 1.5" deep, and if we ever use this chimney again it will have a flue pipe inside, so the bricks will be cosmetic)
 

nelgnl

Getting the hang of it
Joined
Jun 16, 2018
Messages
73
Reaction score
39
Location
NL
Turn the mount upside down so you can mount the turret on top of it?
 

Left Coast Geek

Getting comfortable
Joined
May 20, 2021
Messages
389
Reaction score
398
Location
mid-left coast
Turn the mount upside down so you can mount the turret on top of it?
then I'd be complaining I couldn't get it LOW enough. :p
really, I want it dead level, and as it is its a few degrees down from that.
oh, and water would likely fill up the base.
 

nelgnl

Getting the hang of it
Joined
Jun 16, 2018
Messages
73
Reaction score
39
Location
NL
then I'd be complaining I couldn't get it LOW enough. :p
really, I want it dead level, and as it is its a few degrees down from that.
oh, and water would likely fill up the base.
Lol you're right :D
 

mat200

IPCT Contributor
Joined
Jan 17, 2017
Messages
13,945
Reaction score
23,252
short of putting a wedge between the camera base and the mount, or between the mount and the chimney, i just don't see how I get the right of these two cameras to aim any higher.


(ignore the holes from previous installations, I'll be filling them eventually. note none of these holes go more than 1.5" deep, and if we ever use this chimney again it will have a flue pipe inside, so the bricks will be cosmetic)
Thanks @Left Coast Geek for the image of the cameras and the view ..

looks like you will need to pick on of these options ( if you want a higher frame view ):
1) mount it higher with that mount if you want a higher view
2) put a wedge behind the wall mount
3) use the junction box mount instead ( example PFA122/123 and mount the camera like a pimple coming off the brick wall )

I normally do not like the dremel option..

( of course a nice big PTZ would do the trick also ;)
 
Last edited:

Left Coast Geek

Getting comfortable
Joined
May 20, 2021
Messages
389
Reaction score
398
Location
mid-left coast
that blackout in the lower left is a fence which in the IR illuminator comes out blinding, and throws off the exposure. the 'wide' view camera is just where i want it.

note, btw, its just about 200 feet from these cameras to the roadway. I have my motion triggers set quite sensitive without any sort of "AI" as I do want triggers on squirrels and coyotes and such just for fun. but I have to block out the outer 75 feet or so of driveway (from the road to where it starts to widen just past the trailer) or it triggers on car headlight glare at night, and that road is a rather busy throughfare. I'm still juggling stuff around and playing with camera settings.
 

Cape Fear

Getting the hang of it
Joined
Jul 5, 2021
Messages
20
Reaction score
79
Location
North Carolina, US
I ran into the same problem with the same cam/mount setup, so I just added some shims under the bottom of the bracket that fastens onto the mounting surface (the "base" that the big mount attaches to). I picked the bottom up about 20° and that gave me room to spare.

It looks like you could favor the bottom right side with your shims and easily accomplish the same thing.
 

Left Coast Geek

Getting comfortable
Joined
May 20, 2021
Messages
389
Reaction score
398
Location
mid-left coast
I ran into the same problem with the same cam/mount setup, so I just added some shims under the bottom of the bracket that fastens onto the mounting surface (the "base" that the big mount attaches to). I picked the bottom up about 20° and that gave me room to spare.

It looks like you could favor the bottom right side with your shims and easily accomplish the same thing.
that or a wedge shim between the wall mount bracket and the camera base....
 
Top